

Installing a ceiling fan is one of the most efficient ways to circulate air in an environment that in turn regulates the perceived temperature. Fans are an incredible tool to help make a space more comfortable by using air flow to help cool or warm our bodies. There are many options when looking to purchase and install a ceiling fan. Ceiling fan size is important to understand in relation to room size. Motor size, wing span, and fan downrod length all contribute to help optimal ceiling fan performance. Lightopia’s ceiling fan guide is a comprehensive review with tips to help pick the right fan for your space. Installing a ceiling fan goes hand in hand with making sure you have the correct fan and parts to have a successful installation
Volt Detector
Measuring Tape
Phillips screwdriver and flat head
Electric screwdriver
Wire stripper
Cable cutter (if you have a chain hung pendant)
Step stool / ladder
Sharp knife
Buddy (always easier with some help)
PRO TIP: Prior to installing your ceiling fan make sure you have the correct fan given your unique conditions of location, size needed, downrod or height, and fan controls.
1. Read the instructions from the manufacturer from start to finish to determine whether or not you have the appropriate tools, skill, help, and knowledge to complete the installation. If not, you should hire a local electrician.
2. Determine the height at which you would like the ceiling fan installed. This will depend on your ceiling height and possibly the pitch of your ceiling. If your ceiling is flat please reference the ceiling fan downrod drop lengths in our guide. Ceiling fans require space between the blade and the ceiling in order to have good airflow, this is crucial to performance. Thus, make sure you have at least 5” of clearance between the blade and the ceiling. If your ceiling is vaulted, confirm that the 5” clearance is met. Confirm that you have the correct downrod length to install, if your fan is flush mounted confirm you have a close to ceiling adaptor.
3. Turn off the power at the breaker or switch. The breaker is preferred, however the switch can be used to turn off the power as long as you test before installing. Post a note so that the electricity does not get switched on while installing.
4. TEST using a Volt Detector for safety. Turn off the light switch/breaker. Test your tester to confirm it is operating correctly. Then test the existing fixture or electrical wires to confirm that the electricity is turned OFF.
5. Begin by threading the electrical wires in your junction box through the ceiling fan mounting bracket.
6. Slide the mounting bracket up to the ceiling and secure the bracket to the junction box using #8 screws.
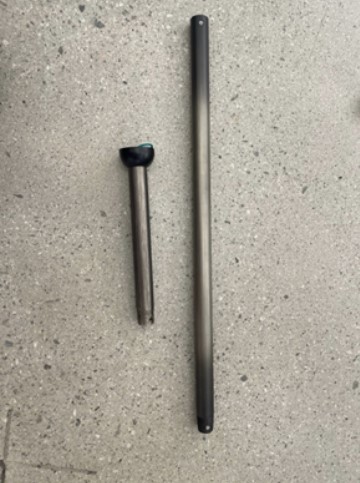
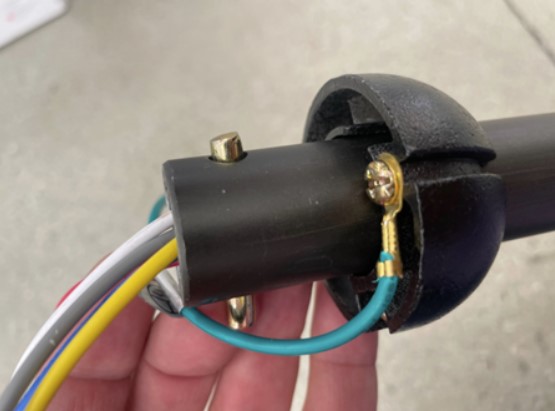
7. If your ceiling fan requires a downrod then fish the ceiling fan wires through the downrod and pull out the other end.

8. Install the downrod onto the ceiling fan base by screwing it on. Then insert the clevis and counter pins so that it connects to the fan base.
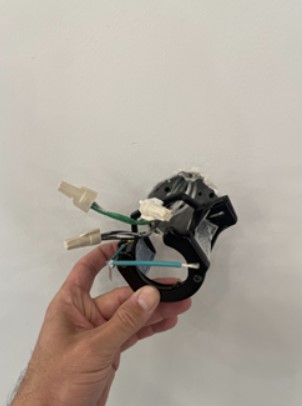
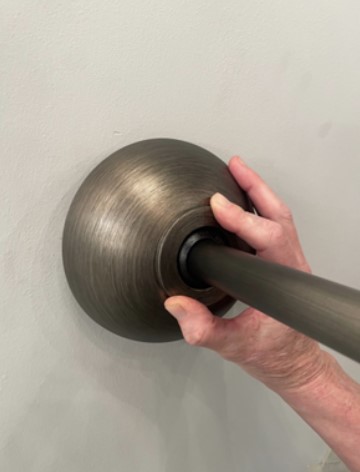
9. Run the wires through the hanger ball and attach the hanger ball to the top of the downrod using the clevis and pin and screw down using a philips screw.
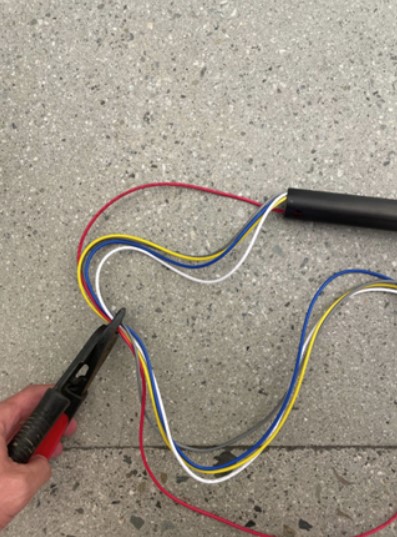
10. Leave about 12 inches of wire at the top and cut off any extra long wires that may not fit in the junction box.
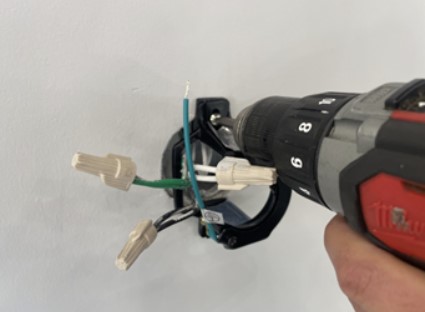
11. Attach the hangar ball at the top of the downrod to the mounting bracket on the ceiling. Pro-Tip: The hangar ball will have an arrow that will need to drop into place to lock in. Rotate the hangar ball until it drops into place. Your fan is now fully supported.
12. Wiring: Start making connections by safely connecting your new fan to the wiring coming from the electrical junction box. There are two options for wiring depending on whether or not you are installing a fan receiver for remote control or wifi use or not.
Installing without a remote or wifi receiver
Installing with a remote or wifi receiver
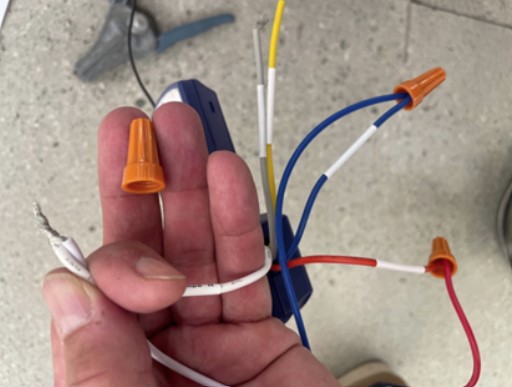
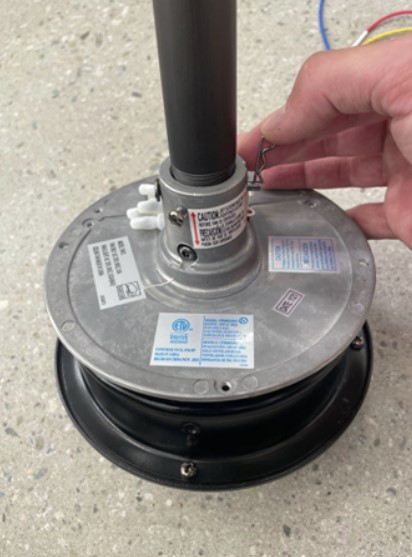
13. Once wires are connected push them all safely into the junction box.
PRO TIP: Make sure all wires are loose, not pinched or in the way of getting the canopy screwed onto wires. Check to see the best you can that all wire nuts have not dislodged.
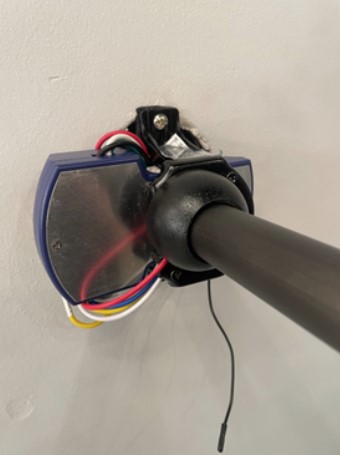
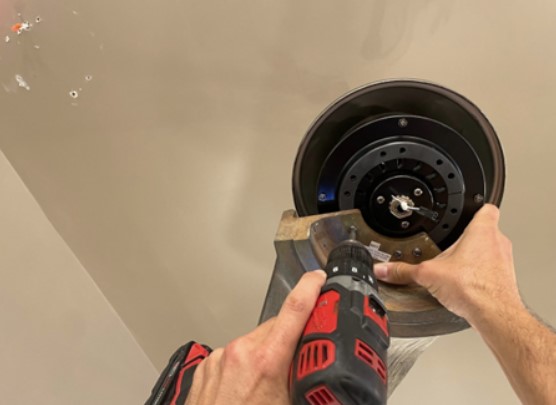
14. Push up the canopy cover onto the mounting bracket and tire the screws.
15. Now you are ready to install the ceiling fan blades! Follow the instructions for your fan but this typically involves pushing the fans onto the pedal or space where they go and using three screws to mount. Make sure to not over tighten. It’s best to use a hand screwdriver instead of a power tool.
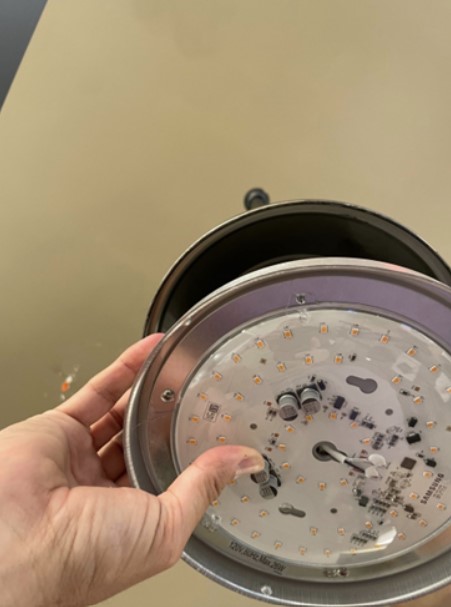
16. You can now move onto the lighting assembly. For your particular fan this may include quick connect wires or a wiring assembly and harness. Tighten the screws and add the shades or cap for cover.
17. You are now ready to start testing your fan. Begin by reading your fans instructions for remote control programming if applicable.
18. Begin by turning the power back on at the breaker.
19. Test accordingly.
Your ceiling fan installation should be a breeze! If you have any questions or issues once the fan has started reference your fans troubleshooting guide. You can also call Lightopia at 877-559-7516 or the manufacturers tech support. Make sure to have the fan model number information readily available.

Your discount code is on its way.
If you don't receive your promo code, please check your email junk or spam folder and click on "Not spam".